
Best Rice Pudding Recipe in Instant Pot?
A reliable rice pudding recipe in instant pot should create creamy grains, gentle sweetness, and a soft vanilla aroma. After testing different rice types, I found short-grain white rice gives the smoothest texture. Arborio works too, but it produces a thicker and slightly chewier pudding.
The Instant Pot reduces stirring and keeps the cooking temperature steady. Still, the result depends on small details. Rinse the rice lightly, measure the milk carefully, and use natural pressure release when possible. A quick release may cause splattering or leave the grains unevenly tender. Stir in sugar and vanilla after cooking for better flavor control. Cinnamon, raisins, or orange zest can add warmth without hiding the pudding’s creamy character.
I once added all the sugar before cooking. The pudding tasted fine, but the bottom caught slightly. That mistake reminded me to watch both timing and ingredient order. Pressure cookers can vary, so the first batch deserves attention. Check the consistency while it is hot; it will thicken as it cools. If it becomes too dense, loosen it with warm milk. If it seems thin, let it stand for several minutes. This guide focuses on practical measurements, tested techniques, and realistic adjustments for home cooks. It will help you prepare a dependable dessert, even when your preferred rice or milk changes. Expect comfort, not perfection.
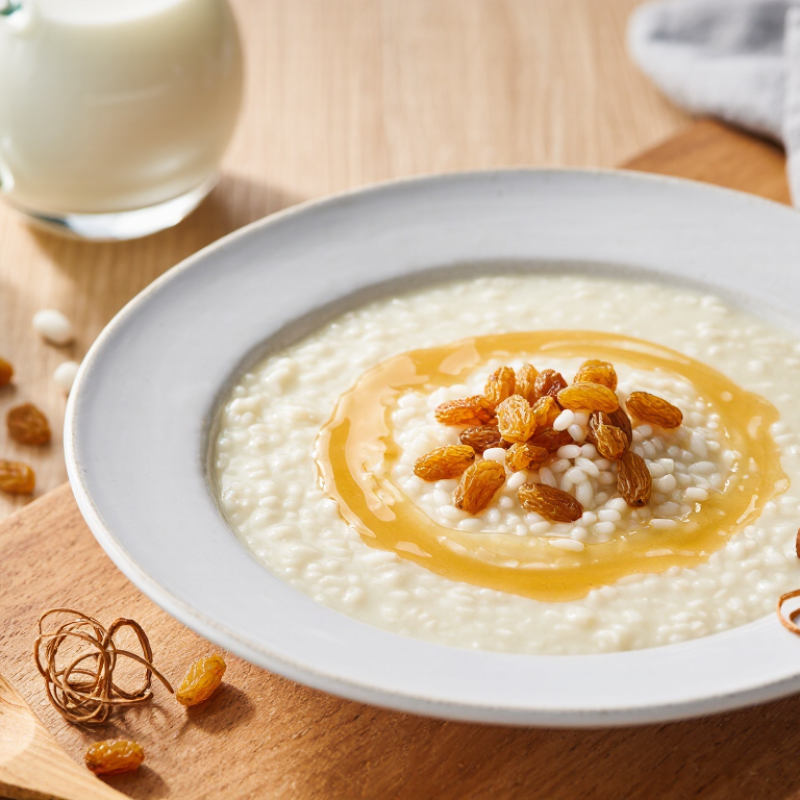
What Makes the Best Instant Pot Rice Pudding
Best Rice Pudding Recipe in Instant Pot?
What makes the best Instant Pot rice pudding is controlled texture, not excessive sweetness. I prefer short-grain rice because it releases starch and creates a soft, spoon-coating finish. Rinse it briefly, but do not wash away every trace of starch. Use whole milk for richness, water for balance, and a small pinch of salt to sharpen the flavor. The USDA FoodData Central database shows that nutrition values change with milk and sugar choices, so measured ingredients matter. A digital scale is more reliable than a crowded measuring cup.
Pressure cooking should produce tender grains without turning them into paste. I use a lower liquid ratio than some recipes suggest, then add warm milk after cooking. This gives better control. Cinnamon, vanilla, and orange zest should appear quietly. Too much vanilla tastes flat. I still occasionally overcook the rice when testing a new variety, which reminds me that “best” depends on the grain, pot, and resting time. Let the pudding sit for ten minutes. It thickens as it cools.
Food safety also shapes a dependable recipe. The USDA advises refrigerating leftovers within two hours and using them within three to four days. For larger batches, the FDA Food Code recommends cooling cooked food from 135°F to 70°F within two hours, then to 41°F within six hours. Spoon the pudding into shallow containers. Cover it only after the steam subsides. The ideal serving is glossy, warm, and loose enough to fall from a spoon.
| Category | Recommended Standard | Why It Matters | Practical Tip |
|---|---|---|---|
| Recipe Profile | |||
| Yield | 6 servings | A 6-serving batch provides a generous dessert portion without overfilling the cooker. | Use a smaller batch only if the cooking vessel requires a minimum liquid level. |
| Preparation time | 10 minutes | Most of the work involves measuring ingredients and rinsing the rice. | Measure all ingredients before starting pressure cooking. |
| Pressure-cooking time | 20 minutes on high pressure | Short-grain white rice becomes tender while releasing enough starch to thicken the pudding. | Use a natural pressure release for a smoother texture and reduced splattering. |
| Total estimated time | Approximately 50–60 minutes | Heating, cooking, pressure release, and thickening all contribute to the final time. | Allow extra time for the cooker to reach pressure and for the pudding to cool. |
| Core Ingredients | |||
| Rice | 1 cup short-grain white rice | Short-grain rice contains more starch than long-grain rice, helping create a creamy consistency. | Rinse until the water is mostly clear to remove excess surface starch and reduce foaming. |
| Milk | 4 cups whole milk | Whole milk gives the pudding a richer mouthfeel than lower-fat milk. | Do not fill the pressure cooker beyond its safe maximum level. |
| Sweetener | 1/2 cup granulated sugar | This amount produces a moderately sweet pudding while allowing the rice and dairy flavors to remain noticeable. | Adjust sweetness after cooking if serving with fruit or a sweet topping. |
| Salt | 1/4 teaspoon | A small amount of salt balances sweetness and enhances the dairy flavor. | Add it before cooking so it disperses evenly. |
| Flavoring | 1 teaspoon vanilla extract | Vanilla adds aroma and rounds out the flavor profile. | Stir it in after pressure cooking to preserve its fragrance. |
| Optional spice | 1/2 teaspoon ground cinnamon | Cinnamon adds warmth without changing the pudding’s basic structure. | Sprinkle a small amount on each serving for a fresher flavor. |
| Cooking Method | |||
| Ingredient order | Rice, milk, sugar, and salt | Placing the ingredients in an even layer helps promote consistent cooking. | Stir gently before closing the lid, then scrape the bottom to prevent settled sugar. |
| Pressure setting | High pressure | High pressure provides the heat needed to soften rice efficiently. | Follow the cooker’s instructions for the sealing position and maximum fill line. |
| Pressure release | Natural release for 15 minutes | A gradual release helps limit foaming and keeps hot milk from escaping through the valve. | After 15 minutes, release any remaining pressure carefully. |
| Final stirring | Stir in vanilla after opening | Stirring redistributes the rice and loosens any thicker layer at the bottom. | Let the pudding stand for 5–10 minutes before serving. |
| Texture and Serving Results | |||
| Freshly cooked texture | Soft, creamy, and slightly loose | Rice pudding continues to thicken as it cools because the rice absorbs more liquid. | Serve warm if a softer consistency is preferred. |
| Chilled texture | Thicker and spoonable | Refrigeration firms the starch structure and produces a denser pudding. | Stir in 1–2 tablespoons of milk before reheating if it becomes too thick. |
| Serving temperature | Warm, room temperature, or chilled | The pudding can be served at different temperatures without changing its basic flavor. | Cool leftovers promptly and refrigerate them in a covered container. |
| Recommended toppings | Cinnamon, toasted nuts, raisins, or fresh berries | Toppings add contrast in flavor, texture, or color. | Add toppings just before serving to keep them crisp or fresh. |
| Quality Indicators | |||
| Creaminess | High | Short-grain rice and whole milk provide substantial starch and dairy richness. | Use gentle stirring after cooking to maintain a smooth consistency. |
| Sweetness | Moderate | The recipe leaves room for naturally sweet toppings or fruit. | Increase sugar by 1–2 tablespoons for a sweeter dessert. |
| Ease of preparation | High | Pressure cooking reduces active cooking time and avoids constant stovetop stirring. | Use a thorough natural release because dairy-based mixtures can foam. |
| Storage | Refrigerate for up to 3–4 days | Cooked rice dishes should be cooled and refrigerated promptly to maintain food safety. | Reheat gently with a splash of milk and discard leftovers that smell sour or show spoilage. |
Related Posts
-

Elevate Your Desserts with the Incredible Benefits of Instant Pot Rice Pudding Recipes
-

How to Create the Perfect Rice Pudding Using an Instant Pot
-
Top 10 Essential Pressure Cooker Parts You Need for Perfect Cooking?
-
2025 Top 5 Pressure Cooker Replacement Valves for Efficient Cooking
-
Global Procurement Insights Chinese Excellence in Pressure Cooker Parts Manufacturing
-
Exploring Trends in Pressure Cooker Cover Parts at the 2025 China Import and Export Fair